Embroidery has been practiced for centuries, evolving from hand-stitched artistry to modern, machine-driven designs. Today, machine embroidery is a popular choice for creating beautiful designs on fabric with precision and speed. However, machine embroidery isn’t just about stitching—there’s a technical aspect to it as well, involving digital files. Choosing the right file type for embroidery projects is one of the most important factors in achieving high-quality embroidery. Different embroidery machines and software programs rely on specific file types to create designs accurately, making the correct choice essential.
In this blog post, we will explore the importance of file types for embroidery, the various embroidery file formats, and the process of machine embroidery digitizing. Whether you are a hobbyist, a small business owner, or a professional embroiderer, understanding these concepts will help you produce beautiful, high-quality embroidery every time.
Introduction to File Type for Embroidery
Embroidery designs created using the software are saved in digital formats known as embroidery file types. These files contain the instructions that guide an embroidery machine’s needle, telling it where to stitch, what colors to use, and in what sequence to apply them. Without the correct file type, an embroidery machine won’t be able to interpret the design accurately, potentially leading to poor-quality output or even machine errors.
Each embroidery machine and software has its specific file formats, and understanding these formats is crucial to ensure that your machine reads the design as intended. Embroidery file formats are different from typical image formats like PNG or JPEG because they contain detailed instructions that machines can follow. Additionally, the process of creating an embroidery file requires an understanding of machine embroidery digitizing, which involves converting a design into a digital format that the machine can read.
The Importance of Choosing the Right File Type for Embroidery
Choosing the right file type for embroidery is critical for several reasons. First, not all file formats are compatible with every embroidery machine. Using the wrong format can result in a distorted design or the machine being unable to read the file at all. Furthermore, each file type has unique features that affect the quality and complexity of the design, such as stitch types, thread colors, and design size.
In machine embroidery, the design process usually starts with creating or purchasing a design. Once you have the design, you need to ensure that it’s in the correct file type for your machine. If you don’t choose the right file type, your machine may not understand the design’s details, leading to errors in stitching or improper color usage. For example, some formats allow for more intricate stitching and color changes, while others are better suited for simple designs.
Thus, choosing the right file type for embroidery is essential for:
Ensuring compatibility with your machine
Preserving design accuracy and quality
Minimizing errors during the embroidery process
Enhancing the final output of the stitched design.
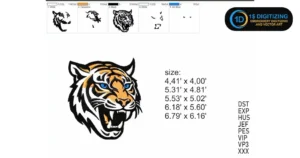
Common Embroidery File Formats Explained
There are numerous embroidery file formats, and each has its unique characteristics. Below are some of the most common embroidery file formats you’ll encounter:
DST (Tajima)
The DST format is one of the most widely used file formats in the embroidery world. Developed by Tajima, a leading manufacturer of embroidery machines, the DST format is compatible with many different brands and models. This format is known for its simplicity—it contains stitch information but no color data, meaning you’ll need to manually input thread colors.
Advantages:
Highly compatible with most embroidery machines
Lightweight and easy to share.
Disadvantages:
No color information is included.
Can be difficult to edit.
PES (Brother, Babylock)
The PES format is commonly used by Brother and Babylock embroidery machines. Unlike DST, PES files contain both stitch and color information, making it easier to preview designs before stitching. This format is popular among home embroiderers because it provides a more user-friendly experience.
Advantages:
Includes color information.
Easy to edit and preview.
Disadvantages:
Larger file size than DST
Limited to certain brands
JEF (Janome)
The JEF format is primarily used by Janome embroidery machines. Like PES, it stores both stitch and color information, but it’s specific to Janome machines. If you own a Janome machine, you’ll likely be working with JEF files regularly.
Advantages:
Stores color and stitch data
Designed for Janome machines.
Disadvantages:
Limited to Janome machines
Less commonly used than DST or PES
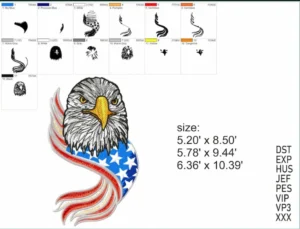
EXP (Melco, Bernina)
The EXP format is used by both Melco and Bernina machines. It’s a versatile format that, like DST, focuses on stitch data but can also store additional information for more complex designs. It’s widely used in commercial embroidery settings.
Advantages:
Can be used in various commercial machines.
Supports complex designs.
Disadvantages:
Larger file size
Not ideal for simpler, home-based embroidery machines
These are just a few examples of embroidery file formats, and each serves a specific purpose. Understanding the strengths and limitations of each format will help you choose the right file type for your embroidery project.
Machine-Specific File Types
Different brands of embroidery machines rely on specific file formats. For instance, Brother machines commonly use PES, while Janome machines use JEF. Even if you have the same design, you’ll need to convert it into a file format that your machine can read. This is where knowing your machine’s file requirements becomes essential.
Below are some of the most popular machine brands and their corresponding file types:
| Machine Brand | File Type |
| Brother | PES |
| Janome | JEF |
| Bernina | ART, EXP |
| Tajima | DST |
| Melco | EXP |
| Singer | XXX |
| Husqvarna | VP3, HUS |
| Pfaff | VIP, VP3 |
When purchasing or creating a design, make sure it’s in a format that your machine can read, or you’ll need to convert it, which can lead to potential loss of quality or functionality.
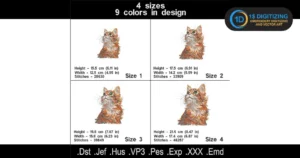
Converting Between File Type for Embroidery
Sometimes you may encounter a situation where you have a design in one format, but your embroidery machine requires a different format. In such cases, converting between file types for embroidery becomes necessary. There are several software tools available for converting embroidery file formats. Some of the most popular include:
Embird: A powerful tool for viewing, editing, and converting embroidery files.
SewArt: An affordable option for basic file conversion and editing.
Wilcom: A professional-grade software that offers advanced conversion features.
When converting a file, it’s important to ensure that no data is lost in the process. For example, converting a PES file (which includes color information) to a DST file (which does not) will strip away the color data, so you’ll need to manually assign thread colors after the conversion. Always check the design carefully after conversion to ensure that it’s still accurate and ready for stitching.
Embroidery File Formats vs. Vector Files: Key Differences
Many beginners confuse embroidery file formats with vector files like SVG or AI. While both are digital representations of designs, they serve very different purposes.
Vector files are used in graphic design and printing, where scalability without loss of quality is key. These files contain points, lines, and curves that define shapes, which makes them ideal for logos, illustrations, and digital prints. However, vector files are not compatible with embroidery machines.
On the other hand, embroidery file types contain stitch information. Instead of defining shapes with curves and lines, they tell the machine how to move the needle, which thread to use, and in what order to apply each stitch. If you try to use a vector file directly in an embroidery machine, it won’t work because the machine doesn’t understand the vector’s instructions.
To use a vector design in embroidery, you need to go through the process of machine embroidery digitizing, which converts the vector into an embroidery file format.
What Is Machine Embroidery Digitizing?
Machine embroidery digitizing is the process of converting artwork, such as a vector file, into a format that can be read by an embroidery machine. This is done using specialized digitizing software, where the design is broken down into a series of stitches, and the path of the embroidery needle is mapped out.
When digitizing a design, several factors are considered, such as:
Stitch type: Fill stitches, satin stitches, and running stitches are some common options.
Stitch direction: The angle at which stitches are applied to the fabric.
Thread colors: Choosing the appropriate colors for the design.
Density: The spacing between stitches, which affects the design’s texture and appearance.
Digitizing is a skill that requires practice and experience. Poorly digitized designs can lead to issues like puckering fabric, broken threads, or incorrect stitching. For those new to embroidery, purchasing pre-digitized designs or hiring a professional digitizer is often the best approach.
Factors to Consider When Choosing a File Type
Choosing the right file type for embroidery depends on several factors:
Machine Compatibility
The most important consideration is whether your machine can read the file format. Always check the machine’s manual or manufacturer’s website to confirm compatible formats before purchasing or downloading a design.
Design Complexity
Some file formats, such as DST, are better suited for simple designs with fewer colors, while others, like PES or JEF, are ideal for more intricate designs that require multiple color changes.
Ease of Editing
If you plan to make changes to the design, such as resizing or altering stitch types, choose a format that supports easy editing. PES and JEF files are generally easier to modify than DST files.
File Size
Some formats, especially those that store a lot of color data, can result in larger file sizes. This may not be an issue for commercial embroidery machines, but for home machines with limited memory, you may need to choose a more compact format.
Thread Information
If you want the file to include detailed thread color information, choose a format that supports this, like PES or JEF, rather than DST, which does not store color data.
Best Practices for File Management in Embroidery
To keep your embroidery projects organized and error-free, consider the following best practices:
Create a backup: Always keep a backup of your original design files, especially if you’ve made significant edits or digitized the design yourself.
Organize files: Store your files in clearly labeled folders by project, format, or machine type to avoid confusion.
Test stitch: Before embroidering on your final fabric, do a test stitch on a scrap piece to ensure the design looks as expected.
Convert with caution: Use reliable software when converting file formats, and always double-check the design after conversion.
Conclusion
Choosing the right file type for embroidery is essential for producing high-quality, accurate designs. From understanding different embroidery file formats to grasping the intricacies of machine embroidery digitizing, this knowledge empowers you to work efficiently with your embroidery machine. Whether you’re working on a simple hobby project or creating custom embroidery designs for clients, paying attention to the file type ensures that your designs stitch out beautifully every time.
By considering your machine’s compatibility, the complexity of the design, and your need for editing or converting files, you can confidently choose the right format for any embroidery project. Remember, a well-chosen file type is the first step towards successful embroidery!
